How to Install Board and Batten Vinyl Siding: Step-by-Step
August 28, 2025
If you’re wondering how to install board and batten vinyl siding, the short answer is: plan your layout, prep the wall and weather barrier, install all trim first, set a dead-level starter, then hang vertical “boards” and cap the seams with “battens,” allowing for movement and drainage at every step. The details below will help you do it cleanly, safely, and in line with manufacturer guidance—so the look lasts.
Safety, Codes, and Warranty Basics
- Wear PPE, use a ladder stabilizer, and avoid cutting vinyl in high winds or extreme temps.
- Check local building codes and wind-load requirements.
- Follow the manufacturer’s instructions on fasteners, slot nailing, and clearances; this protects your warranty.


Tools and Materials Checklist
Tape measure, level, chalk line, square, snips/circular saw (fine-tooth), drill/driver, hammer, ring shank galvanized nails or approved screws, housewrap/WRB and flashing tape, starter strips, J-channel, inside/outside corner posts, utility/finish trim, drip cap/head flashing, soffit/fascia components, and trim blocks for fixtures.
Planning the Layout
A great board-and-batten look starts on paper. Decide your board reveal and batten width first, then snap control lines. Use a long level or laser to square the first elevation. Plan your board and batten vinyl siding spacing so patterns land symmetrically at corners and around windows; adjust your first panel position to avoid slivers near openings. Remember vinyl expands and contracts—leave the specified movement gaps.
Substrate Prep and Weather Barrier
Repair loose or damaged sheathing. Install or verify continuous house wrap (WRB) with taped seams and properly flashed penetrations. On uneven walls or when installing over existing cladding, add furring strips to create a flat plane and a small drainage space (rainscreen gap) behind the panels.
Trim and Accessories First
- Corner posts: Set outside and inside corner posts plumb, with bottom clearances and top movement gaps per spec.
- Openings: Install
J-channel around windows and doors; add
drip cap flashing over horizontal trims.
- Terminations: Place utility/finish trim where the top course will lock. Add trim blocks for lights, hose bibs, and vents so you don’t rely on caulk at the vinyl surface.
Starter Course and First Panel
Snap a level line and install the starter strip perfectly straight—this controls everything above it. Compensate for wavy foundations by shimming or stepping the starter as needed. Dry-fit the first vertical panel to verify reveal and edge clearances at corners and openings.
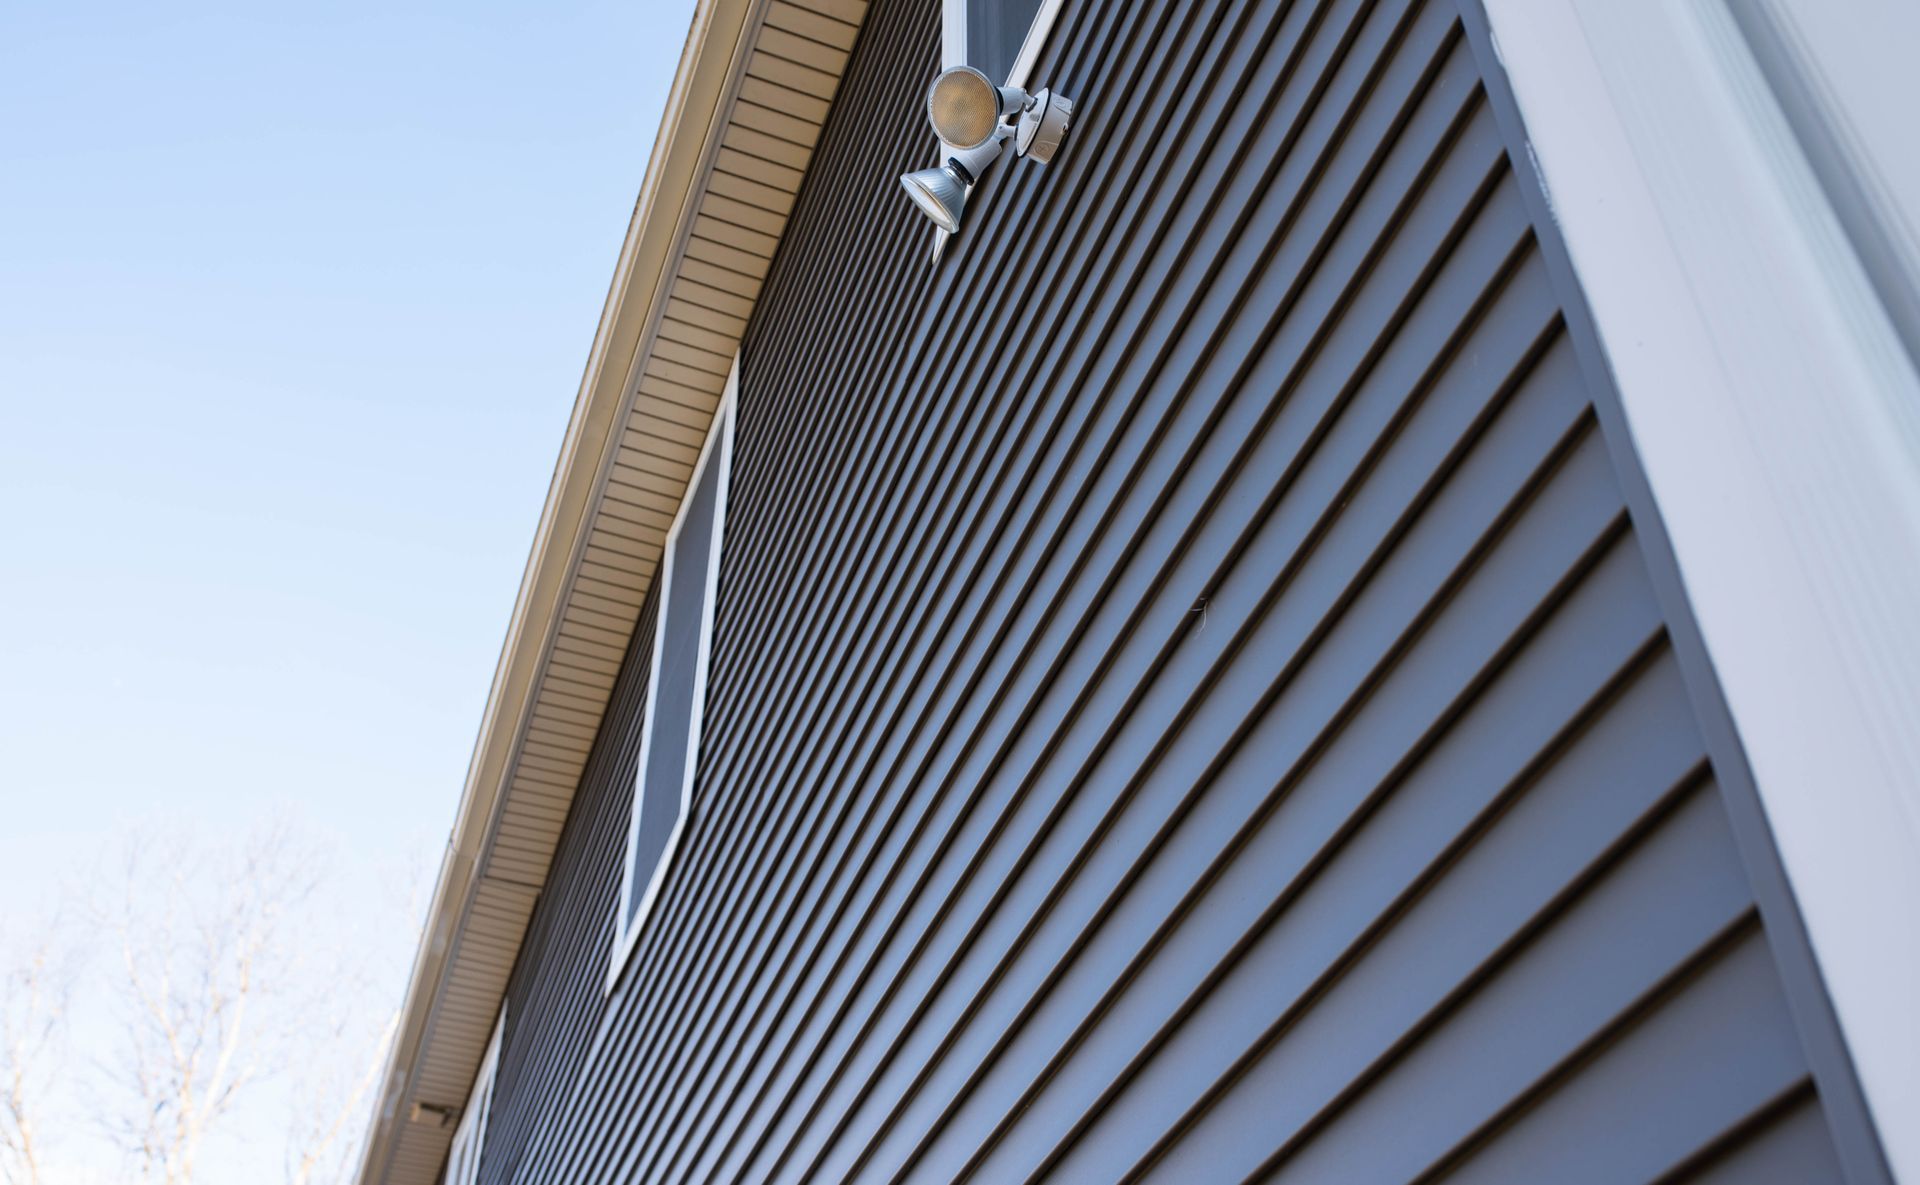
Installing the Boards (Vertical Panels)
Cut panels with clean edges and lock them gently—never force them tight. Nail in the center of the slots and keep nails perpendicular to the wall; leave a paper-thin gap between the fastener head and the vinyl so the panel can move. Check plumb every few courses and maintain your planned reveal as you go.
Installing the Battens
With boards in place, align battens to your layout marks and keep a consistent pattern through corners and across wide walls. Where battens meet soffits, decks, or water tables, use trim pieces to capture cut edges and maintain drainage paths. Sequence seams so they’re less visible on the most prominent elevations.
Around Openings and Penetrations
Integrate J-channel, drip cap, and sill details to shed water. For fixtures and vents, use mounting blocks and flash to the WRB—not just to the siding skin. At roof-to-wall intersections, include kick-out and step flashing and maintain siding clearances so water isn’t trapped.
Gables, Eaves, and Transitions
Template your gable angles for repeatable cuts. Finish under soffits with finish/utility trim to lock cut edges cleanly. Where vinyl meets brick, stone, or fiber cement, use Z-flashing or compatible transitions to prevent capillary action and staining.
Top Course and Terminations
Capture the final panel edges in finish/utility trim, keeping all manufacturer movement gaps. Sight the wall from multiple angles and fine-tune any “waves” before calling it done.
Quality Control and Troubleshooting
- Overdriven nails or tight joints cause buckling; back out and reset.
- Wavy layout often traces back to an out-of-level starter—correct before proceeding.
- Oil-canning or uneven reveals? Re-check plumb and spacing; adjust battens to re-center the pattern.
- After the first heavy rain, do a quick check at corners, headwalls, and window sills.
Cleanup, Maintenance, and Cost Notes
Dispose of offcuts, protect landscaping, and wash panels periodically with mild soap. Costs per square vary with wall complexity (openings, gables, roof-to-wall intersections) and trim level. If you’re unsure about substrate repairs, complex flashing, or warranty paperwork, bring in a pro.
Printable Homeowner Checklist
- Confirm codes/warranty requirements and gather materials.
- Snap level starter line; install corners, J-channel, drip caps, and finish trim.
- Hang vertical boards (center-slot nailing; movement gaps).
- Install battens to layout; keep pattern consistent.
- Flash penetrations and transitions; never rely on surface caulk.
- Final QC: reveals, plumb, clearances, and sightlines.
Need a hand with layout, spacing, and waterproofing details? Our team installs board-and-batten vinyl every week. We’ll plan your pattern, protect the envelope, and deliver a crisp, warrantied finish. Schedule your estimate today.
Share this Post
Recent Blog Post